 Happy Thanksgiving! After Thanksgiving most people have lots of food leftover (Which is amazing because we have eaten so much the day before). If you are looking for a way to use up your leftover turkey, then consider this recipe. It has lots of wonderful flavor but with a completely different taste than your Thanksgiving meal. And because many of the ingredients were used in your Thanksgiving feast in one way or another you will probably only need a few more items to put an entirely new meal on the table.
Serves: 4
Start to Finish: 30 minutes
Recipe By: Robyn Hardisty
Ingredients:
2 cups uncooked penne pasta
8 fresh asparagus spears, trimmed and cut into 1-inch pieces
2/3 cup julienned carrot
3 TBSP butter
1/2 cup chopped yellow squash
1/2 cup chopped zucchini
1 1/2 cups shredded cooked turkey
1 medium tomato, chopped
1 envelope Italian salad dressing mix
1 cup heavy whipping cream
1/4 cup grated Parmesan cheese
Directions:
1. Cook pasta according to package directions.
2. Meanwhile, in a large skillet, saute asparagus and carrot in butter for 3 minutes.
3. Add yellow squash and zucchini; saute until crisp-tender.
4. Stir in the turkey, tomato, dressing mix and cream.
5. Bring to a boil; cook and stir for 2 minutes.
6. Drain pasta; add to vegetable mixture and toss to combine.
7. Sprinkle with Parmesan cheese.
8. Toss again before serving.
Next Day Turkey Primavera
Thursday, November 27, 2008Posted by Amber at 6:48 AM 1 comments
One Month and Counting!
Wednesday, November 26, 2008 I have officially hit the 30-day point; marking the last month of my pregnancy. Hooray! Michael and I are very excited for the expected arrival of our second little boy. I am doubly so, since it means I will no longer be uncomfortably pregnant or waddle like an duck.
My due date is approaching and I am simplifying my life, cutting back on the things I commit to do. Which means most of our dinners right now are usually something heated from the freezer, Chinese take-out, or pancakes. It makes life so much easier... but it doesn't make for very interesting recipe posts.
Our family blog will soon be full of activity but my cooking blog will be sporadic for a few months until things settle.
Posted by Amber at 6:34 AM 2 comments
Labels: miscellaneous
The Lasagna Compromise
Monday, November 24, 2008 I love my mom's lasagna! It is full of cheeses; it even has cream cheese in it, yummm. But Mike thinks it is too cheesy, and dislikes the cream cheese especially. Mike likes his mom's lasagna which I find doesn't have enough cheese or sauce in it and has too much meat. Because of this I didn't make lasagna for the first few years of our marriage since neither of us could agree on which recipe to make. After a while I decided we should come up with an entirely new recipe that would satisfy both of our lasagna tastes. We finally found a wining recipe that scored big points with both of us.
Serves: 9 servings
Start to Finish: 1 1/2 hours (only 20 min of this is actual prep work the rest is cooking and cooling)
Recipe By: Original recipe by Becky Ruff, with alterations to fit our tastes.
Ingredients:
1/2 lb ground beef
1 (13-oz) jar spaghetti sauce
1/4 cup water
1 egg, beaten
1 (12-oz) ctn cottage cheese
1/4 cup grated Parmesan cheese
1 TBSP dried parsley flakes
1/4 tsp each garlic powder, pepper, dried basil and oregano
9 uncooked lasagna noodles
3/4 cup mozzarella cheese, shredded
Directions:
1. Preheat oven to 375°.
2. Grease an 8-in x 8-in baking dish.
3. In a large skillet, cook beef over medium heat until no longer pink; drain.
4. Stir in the spaghetti sauce and water.
5. Simmer, uncovered, for 10 minutes.
6. Meanwhile, in a large bowl, combine egg, cottage cheese, Parmesan cheese, parsley flakes, and seasonings.
7. Spread 1/2 cup meat sauce into the baking dish.
8. Layer with three noodles and a third of the cheese mixture, meat sauce and mozzarella cheese. (You will need to break up the noodles a little to get them to fit, but no one will notice any breaks after it has been cooked)
9. Repeat layers twice, ending with mozzarella cheese.
10. Cover and bake at 375° for 45 minutes. (Covering is important to keep the lasagna from drying out.)
11. Uncover; bake 5 minutes longer. (Just long enough for the cheese on top to cook up nicely)
12. Let stand for 15 minutes before serving.
Posted by Amber at 9:08 AM 1 comments
I Spy Bags
Monday, November 17, 2008
Makes: One 8-in x 8-in bag
Start to Finish: 2 hours
Materials:
1 piece fabric 18-in x 9-in (If you use flannel it won't fray but it is stretchy so it adds an additional challenge when sewing. If you use a fabric that frays you will have to add an additional hem around the viewing window.)
1 bag poly pellets (A 2 lb. bag will fill approx. three 8-in x 8-in "I Spy" bags. Available in the doll-making section of Michael's or JoAnns)
20-25 assorted toys and items to find in the bag (I choose ones about the size of a quarter because I did not want them too hard for my little ones to find, if you have older children you may want to make it more challenging by making them smaller in size. Also, avoid anything with sharp enough edges to poke through the vinyl.)
1 small piece clear vinyl (a clear vinyl tablecloth from Wal-mart is a good place to start; or you can try JoAnns)
thread
sewing machine
scissors
funnel and cookie sheet (optional)
Directions:
1. Fold fabric in half making a 9-in x 9-in square
2. Cut a window in the center of one side of the fabric. (If you are using a fabric that frays you will have to hem the edges of the window, if you are using a flannel you can leave it as is)
3. Cut your clear vinyl much bigger than the window. (Vinyl is difficult to work with; give yourself a lot of wiggle room)
4. Lay vinyl on wrong side of window.
5. Pin vinyl to fabric outside of where you are going to sew. You do not want to put additional holes in the vinyl and fabric at the edge, where you will sew.
6. Sew around window opening, stitching vinyl and fabric together. (The vinyl tends to stick to the foot of your sewing machine and can ruin your bag. Some options around this problem: Don't lower the foot onto the vinyl when sewing, wet the vinyl with a damp sponge while sewing, cover with strip of masking tape and sew, or cover with tissue paper and sew. I found success with the masking tape technique.)
7. Make sure your stitches leave no openings for the pellets to sneak out of. Trim vinyl down so only 1/4" to 1/2" remains outside seam.
8. Turn bag so the wrong sides are together. Sew around all edges, leaving a small (2-3" opening for turning the bag right side out.
9. Turn fabric right side out. You should now have an empty bag with a small hole in the top.
10. Using the small hole in the top fill your bag with toys.
11. Next fill the bag with poly pellets as full as you want. (When you fill with poly pellets, I suggest using a funnel and pouring over a cookie sheet, because poly pellets make a huge mess when they spill.)
12. After your bag is filled, top-stitch around the edge, closing the hole and reinforcing the outer edge. (Make sure you really reinforce the edges and window of the bag. You do not want your child to accidentally get a bag open and swallow any of the little toys or beads inside. Design the bag properly so it can take the beatings little hands can dish out.)
13. Make a tag to attach to the bag that list the items to find inside. (I choose to take pictures of all my items hidden inside and use those as tags instead because my little ones wont be reading for some time.)
Posted by Amber at 8:21 AM 4 comments
Labels: miscellaneous
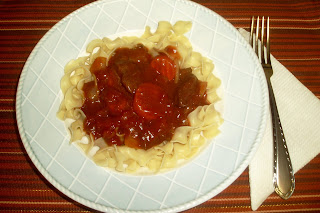
Beef Burgundy
Monday, November 10, 2008
Serves: 4
Start to Finish: 30 minutes
Recipe By: Sandra Lee, with adjustments to suit Mike and my tastes.
Ingredients:
1 cup chopped onion
1 cup loose-pack frozen carrot slices
(Optional add-in: 1 cup fresh button mushrooms)
2 TBSP tomato paste
1 (14-oz) can diced tomatoes with basil, garlic, and oregano
1 (17-oz) pkg beef tips in gravy
8 strips of bacon
1 cup cranberry juice
1 pkg egg noodles
Directions:
1. Chop onion.
2. In a large skillet fry bacon until crisp.
3. Drain and discard bacon fat, crumble bacon.
4. Add onion, carrots, tomato paste, diced tomatoes, beef tips with gravy, bacon crumbles, and cranberry juice to skillet; bring to boil.
5. Reduce heat to low and simmer for 10 minutes.
6. Meanwhile, cook noodles according to package directions.
7. Serve beef burgundy over noodles.
Posted by Amber at 8:42 AM 0 comments
Labels: beef
Chicken and Asparagus with Creamy Dijon Sauce
Friday, November 7, 2008
Serves: 4
Start to Finish: 30 minutes
Recipe By: FoodFit (it is a very healthy dinner with a bold taste)
Ingredients:
1 lb chicken breasts, sliced
1 TBSP olive oil
salt to taste
freshly ground black pepper
1 lb asparagus (approximately 15 spears = 1 lb). See tip below for trimming asparagus
1 small onion, finely diced
2 cloves garlic, finely minced
1 1/2 cup low-sodium chicken broth
2 TBSP Dijon mustard
1/2 cup low-fat sour cream
Directions:
1. Heat the olive oil in a large sauté pan over medium-high heat.
2. Season the chicken strips with salt and pepper, add them to the pan in a single layer.
3. Sauté the chicken on both sides until golden brown, about 2 minutes per side.
4. Transfer the chicken to a platter and keep warm.
5. Meanwhile, place the asparagus in plastic Ziploc bag. Zip bag almost closed, leaving 2 inches for steam to escape.
6. Microwave the asparagus on high until it is just tender, about 2 minutes.
7. Drain and set aside.
8. Lower the heat for your saute pan and add the onions. Cook until the onions are soft and translucent, about 3 minutes.
9. Add the garlic and cook for 1 minute more.
10. Add the chicken broth and reduce it by half over medium heat.
11. Whisk in the mustard and sour cream, stir until the sauce is smooth and creamy. (Be attentive to whisking the sour cream or it will curdle in the hot pan.)
12. Add the chicken and asparagus to the sauce to heat them for a minute or two.
How to Trim Asparagus:
Snap-off the lower ends....
Hold the top half of a spear in one hand and pinch the bottom of the spear with your other hand. Bend lightly and the tough lower end will snap off at the exact place where it meets the more tender part of the spear. The part that breaks off will be approximately 1 -2 inches long. Discard the tough end, or use as a puree for soups.
Posted by Amber at 5:37 AM 0 comments
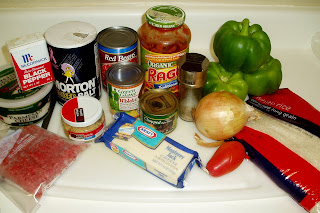
Stuffed Peppers
Tuesday, November 4, 2008
Serves: 4
Start to Finish: 30 minutes to prep/ 2 hours in the slow-cooker
Recipe By: Original recipe by Melissa McCabe which I adapted to better suit Mike and my tastes
Ingredients:
4 large sweet peppers
1 cup cooked rice
1/4 lb ground beef
1 small tomato, diced
1/2 cup canned corn
1/2 small sweet onion, diced
1/4 cup canned red beans, rinsed and drained
1/4 cup canned black beans, rinsed and drained
1/2 cup Monterey Jack cheese, shredded
1/2 (4-oz) can chopped olives
1/2 tsp basil
1 1/2 garlic cloves, minced
salt and pepper to taste
1 1/4 cup spaghetti sauce
1/2 cup water
2 TBSP grated Parmesan cheese, plus some for garnish
Directions:
1. Cut tops off peppers and remove seeds.
2. Salt the inside of the peppers; set aside.
3. In a small skillet, brown the ground beef over medium-high heat until no longer pink.
4. In a large bowl combine: rice, ground beef, tomatoes, corn, onion, beans, cheese, olives, basil, garlic, salt and pepper.
5. Combine spaghetti sauce and water in separate bowl.
6. Pour half the sauce into the bottom of the slow cooker, pour the other half into the rice and beef mixture.
7. Spoon rice and beef mixture into peppers.
8. Add the stuffed peppers to the slow cooker (my slow-cooker is SMALL, so I stacked the peppers in any way I could fit them and they still came out perfectly cooked).
9. Sprinkle with Parmesan cheese.
10. Cover and cook on low for 2 hours or until peppers are tender.
11. Sprinkle with additional Parmesan cheese and serve.
Posted by Amber at 8:55 AM 2 comments
Labels: beef, slow-cooker, vegetable


