

 Kiwi is a fruit that normally scares my kids. It is brown, fuzzy, sour, and green with LOTS of seeds. I couldn't get them to even consider eating kiwi. So I was steeling myself for the very really possibility that I would be making all these swampy treats for no one but myself to eat. However, I was pleasantly surprised when Van insisted on trying the "froggie ice creams" as soon as I start making the batch, and cried when he learned they had to freeze for 4 hours before he could eat them. (4 hours is forever in little boy terms.) Not only did he try one, but both my boys finished all these pops within TWO days of making the batch and couldn't wait to lick their frogs out of the icy confines.
Serves: 8
Start-to-Finish: 20 minutes + 4 hours freezing
Recipe By: Family Fun Magazine
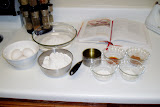
Ingredients
3 kiwi fruit
1 1/4 cup of limeade
1 tablespoon of honey
8 (3-oz) paper cups
Popsicle sticks
plastic frogs
Directions:
1. Place plastic frogs upside-down in the bottom of the cups.
2. Fill the cups in with a small amount of water, just to cover the body of the frog (it doesn't need to completely cover the frogs, when it freezes you really only need to see the top of the frog to get the effect we are trying to achieve)
3. Place cups into a Pyrex baking dish and freeze for 10 minutes, or until water has frozen
4. Meanwhile, peel and cut 2 kiwi fruits into chunks.
5. Blend the fruit chunks with limeade and honey until the mixture is somewhat smooth.
6. Remove the frozen frogs from the freezer.
7. Slice the last kiwi fruit into eight thin pieces and place them over the bottom of the frozen frogs in the cups (when you flip the Popsicle over it should look like the frogs are resting on kiwi lily pads).
8. Pour the blended mixture into the cups.
9. Place the cups back in the Pyrex baking dish and cover them with foil.
10. Insert a popsicle stick through the foil and into each cup (the foil will hold the sticks in place).
11. Freeze the pops until solid, about 4 hours.
12. When you're ready to remove the pops from their molds, you can loosen them by briefly dipping the bottoms of the cups in warm water.


Frozen Frog Eggs
Wednesday, October 13, 2010Fruit Salad Jack-o'-Lanterns
Tuesday, October 12, 2010 Just like an orange bell pepper can look like a carved pumpkin so can an orange. I am beginning to wonder if everything orange can be carved with a jack-o'-lantern face a pass for a pumkin. Watch out orange tomatos, you're next. This smiling orange bowl can be used to hold almost anything from veggie salad, to jello, to icecream but today I am making them into fruit cups for a healthy snack.
Serves: 4
Start-to-Finish: 30 minutes
Recipe By: Amber Brunson
Ingredients:
4 oranges
2 bananas
8 strawberries
1/2 cup grapes
Directions:
1. Cut off top of orange, Do not discard top
2. Using a spoon, hollow out the inside of the oranges (do not discard orange pulp)
3. Cut a jack-o'-lantern face into the side of the orange
4. Cut up fruit into bite size pieces
5. Cut up orange pulp and add to the fruit
6. Mix together fruit
7. Spoon cut up fruit into the orange bowls


Spider Snacks
Monday, October 11, 2010 Spider snacks are fun and simple. They require almost no time at all to put together and you can subsitute many of the ingredients for things you already have on hand and still get a fun treat. The Ritz crackers can be any round cracker, the peanut butter can be cream cheese or frosting, the spider legs can be chow mein noodles (they make the legs really wiggle which I like, but my kids wont eat them yet), and the eyes can be raisins for a healthier treat. With all these options there is no reason you can't whip these little spooky cuties up this very afternoon.
Serves: 4 (2 spider snacks each)
Start-to-Finish: 15 minutes
Recipe By: Taste of Home Magazine
Ingredients:
16 Ritz crackers
64 stick pretzels
1/2 cup peanut butter
decoration for eyes (marshmallows, mini chocolate chips, M&Ms, chocolate morsels, raisins, etc...)
Directions:
1. Spread a thin layer of peanut butter on all the Ritz crackers.
2. Set pretzels in 8 of the Ritz cracker to look like spider legs.
3. Top the pretzel crackers with the non-pretzel crackers to make a sandwich.
4. Decorate with marshmallows and mini chocolate chips to make eyes (You can use peanut butter to hold them in place)


Boo-nanas
Sunday, October 10, 2010 This recipe looked so simple and obvious, but don't be fooled like I was. It took me three bags of white chocolate to finally get a working ghost. What was the problem? I was burning the chocolate. White chocolate is MUCH more fickle than milk or dark chocolate. It can get overheated fast and seize up on you. Also, if your bananas start to de-thaw before you get the chocolate on them the chocolate will just slide around instead of sticking. Some recipes are really easy and recommend them to all levels of cooks out there. This is not one. If you are not confident with your white chocolate skills be warned, this recipe will probably drive you crazy.
Serves: 4 (1/2 banana each)
Start-to-Finish:15 minutes + 3 hours freeze time
Recipe By: Family Fun Magazine
Ingredients:
2 bananas
1 1/4 cup white chocolate morsels
4 Popsicle sticks
milk chocolate morsels and mini milk chocolate morsels for decorating the eyes and mouth
Directions:
1. Cut the bananas in half (don't not peel yet)
2. Insert Popsicle sticks half-way into the bananas.
3. Peel skins off the bananas.
4. Freeze for at least 3 hours.
5. Meanwhile, put white chocolate morsels in a microwave-safe bowl.
6. Microwave on medium heat for 1 minute, stirring every 15 to 30 seconds.
7. When white chocolate morsels are melted, take bananas out of freezer and spread on the white chocolate using a knife or spoon (the white chocolate will begin to harden as soon as it touches the frozen banana so work quickly and smooth your lines as you go).
8. Add milk chocolate morsels for eyes and mouth.
9. Keep frozen until ready to eat


 This is what your chocolate will look like if it has overheated and seized. It is lumpy, gritty, and in general a total nuisance. I found it helpful to microwave on a lower power, stir every 15-30 seconds, and take the bowl out of the microwave when stirring so the bowl had a chance to cool off before continuing to melt the chocolate. Also, avoid using a wooden spoon to keep any moisture out of the chocolate; water will cause chocolate to seize.
Pretzel Skeleton
Saturday, October 9, 2010 A fun activity and an after school snack. This skeleton is made with assorted pretzel shapes that you little ones can build over a skeleton picture. This activity is simple enough for even very young children to understand and older children can learn the names of different bones in the body. Serve this fun activity alongside a bowl of peanut butter or nacho cheese for dipping and let your kids create a spooky Halloween friend. If your grocery store isn't carrying the pretzel shapes you are looking for, this activity can also be done with assorted cracker shapes or noodles, so don't be discouraged.
Serves: 1
Start-to-Finish: 5 minutes
Recipe By: Amber Brunson
Ingredients:
1 bag of assorted pretzel shapes (round, sticks, twist, rods, pieces, snaps, etc..)
skeleton bones picture (either print one free from the internet here and here or draw your own)
optional: peanut butter, melted chocolate, nacho cheese, or ranch dressing for dipping
Directions:
1. Print out a skeleton bones picture. (One for each child)
2. Using the shaped pretzel create a pretzel skeleton over the picture of the skeleton bones.
3. Eat the pretzels either plain or dipped in your favorite sauce.


The Skeleton Dance: this is an adorable video from YouTube. Appropriate for children of all ages. Very cute song about the bones of the body.
Creepers Peepers
Friday, October 8, 2010 Even as a kid, I was fascinated by Jello Jigglers. They are just so much fun and I LOVE that they hold a shape. Van is the perfect age for these treats (3 years) he calls them "jig-lies" and he will play with them forever. He will make the shapes dance and wiggle. He will toss them up and watch them jiggle in the air. He is enthralled by their playfulness. He does make a complete mess of himself though and I will often have to wash him in the sink when he is done eating. If you don't like the consistancy of Jello Jigglers or don't have the extra gelatin packets on hand, this Halloween creation can be made with the classic Jello preparation as well. This dish was made with sugar-free Jello so it was a snack I could feel good about feeding my boys.
 Serves: 4 (1 cup servings)
Start-to-Finish: 15 minutes + refrigeration
Recipe By:
Ingredients:
12 oz jello gelatin (4 small packages or 2 large packages)
2 1/2 cups boiling water
whipping cream
8 blueberries
Directions:
1. In a small saucepan, boil water.
2. Add boiling water to gelatin powder.
3. Stir for 3 minutes, or until powder is completely dissloved.
4. Pour into a 9 x 13 glass pan.
5. Refrigerate for 3 hours.
6. To unmold, dip bottom of glass pan in warm water for 15 seconds to release.
7. Cut jello into shapes or squares.
8. Serve in a bowl with whipping cream and blueberries for eyes.


Ham and Cheese Spookables
Thursday, October 7, 2010 Halloween + Lunchables = Spookables! These fun cracker sandwiches are pretty self-explanatory. I used a set of mini cookie cutters to get my Halloween shapes. You can usually pick them up at Target or Walmart around the Halloween season.
Serves: 4
Start-to-Finish: 15 minutes
Recipe By: Amber Brunson
Ingredients:
16-20 Ritz crackers
5 slices of cheese (I used both American and Monterrey for the variety of color)
4 slices of deli meat
Directions:
1. Cut Halloween shapes from cheese.
2. Cut Halloween shapes from deli meat (I had to push really hard to make sure the cutter was going all the way through the meat, I am not you will get a good cut with a plastic cookie cutter.)
3. Serves with Ritz crackers


Buried Alive Banana-Cranberry Muffins
Wednesday, October 6, 2010 Not only are these muffins delicious but healthy, too. The tartness of the cranberries offsets the sweet banana batter and the texture is smooth and light. Like I said before... DELICIOUS! Even those who don't like traditional banana bread will be converted by these fluffly, cake-like muffins. The arms poking out of the muffins are cake picks (toothpicks with a decorative end). There are other picks available at Amazon.com or you can use Barbie doll arms like this woman (click here) or stop by your local craft store and buy doll arms and legs.
Serves: 20 muffins
Start-to-Finish: 30 min prep + 25 min bake
Recipe By: muffin recipe by Betty Crocker and arm idea by Rachael Ray (I am one of the people who thinks the baby arm that was originally thought up by the design team is morbid and does not reflex the happy Halloween spirit, so I made my own spin on the idea.)
Ingredients:
1 1/4 cups sugar
1/2 cup vegetable shortening (no substitutions)
2 eggs
1 1/2 cups mashed very ripe bananas (about 3-4 bananas very well mashed)
1/2 cup buttermilk (I never have buttermilk so I substitute with 1/2 TBSP lemon juice mixed with 1/2 cup milk)
1 teaspoon vanilla
2 1/2 cups flour
1 teaspoon baking soda
1 teaspoon salt
1-2 cups chopped frozen or fresh cranberries
Directions:
1. Move oven rack to low position so that tops of muffins will be in center of oven.
2. Heat oven to 350°F.
3. Grease or paper line your muffin tins.
4. Mix sugar and butter in large bowl.
5. Stir in eggs until well blended.
6. Add bananas, buttermilk, and vanilla.
7. Beat until smooth.
8. Stir in flour, baking soda and salt.
9. Stir in chopped cranberries.
10. Pour into muffin tins (approximately 3/4 full).
11. Bake 20-22 minutes, or until toothpick inserted in center comes out clean.
12. Cool 10 minutes.
13. Rough up the tops of the muffins so it looks like overturned dirt.
14. Insert your cake picks into the roughed-up muffin and serve


Dip and Bones
Tuesday, October 5, 2010 Chips and dip is a classic snacky food. This chili con queso recipe is one of my favorites from childhood. My grandma used to make this recipe when her grandkids would come to visit. With only two ingredients and virtually no prep this is one your children will be able to make themselves as soon as they can use the microwave. The orangy-brown coloring of the dip is an added Halloween bonus. These cute bone chips are cut from tortilla shells and can be served with any salsa or dip your kids will eat.
Serves: 4
Start-to-Finish: 30 minutes
Recipe By: Ruth Jones
Ingredients:
Bone chips:
1 (30 count) pkg corn tortillas
vegetable oil
Chili con queso:
1 (8-oz) pkg cream cheese
1 (16-oz) can chili (with or without beans; whatever your preference)
Directions:
1. In a medium, microwave-safe bowl mix cream cheese and chili.
2. Microwave on high for 5 minutes stirring every minute until the cheese is melted and the mixture is smooth.
3. Set aside chili con queso dip.
4. Using a cookie cutter, cut out corn tortillas into the shapes of bones (I was able to get two bones from each tortilla shell).
5. Heat vegetable oil in a fry pan over medium-high heat until popping.
6. Fry tortilla cut-outs for 2 minutes a side, or until crispy and browned.
7. Serve chips with chili con queso dip.


Subscribe to:
Posts (Atom)