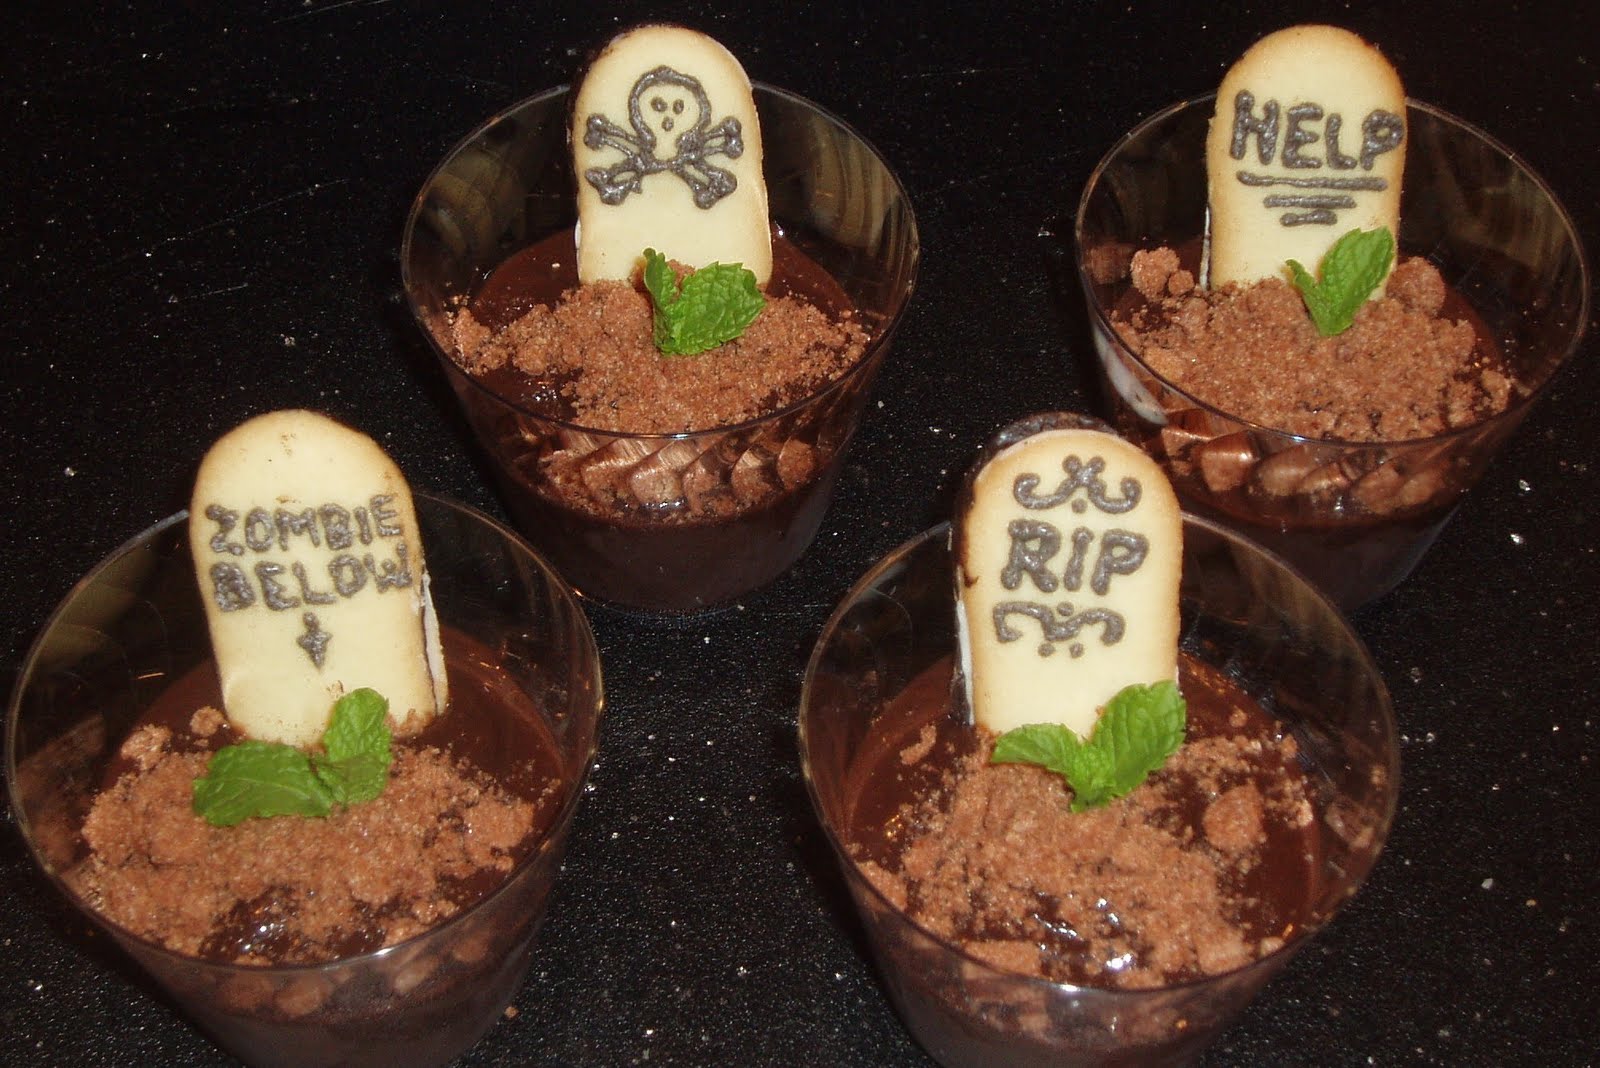
Graveyard Pudding

Sunday, October 3, 2010

It can't get any easier than pudding mix from a box, right? With all the time you saved on the pudding you can decorate delicious Milano cookies to look like tombstones (this was my favorite part). Cookies, pudding, and chocolate graham cracker crumbs and Voila! you have your very own haunted graveyard. I garnished my grave sites with sprigs of mint because it is growing rampant in my backyard and it was easy; but you can also use an edible flower or even little plastic flowers (just be sure to take them out before you serve them to your small children).


Serves: 4
Start-to-Finish: 15 min prep + 30 min chill time
Recipe By: Sunset Magazine

Ingredients:

Pudding:
1 box chocolate flavored pudding mix
2 cups milk

Chocolate Icing:
3 TBSP butter, softened
1/4 cup unsweetened cocoa powder
1 1/3 cup powdered sugar
2 TBSP milk
1/2 tsp vanilla extract

Decorations:
4 Milano cookies
1/4 cup chocolate graham cracker crumbs
Mint leaves (optional garnish)

Directions:

1. Prepare pudding mix as directed on box; pour into 4 single serving cups.
2. Refrigerate pudding cups for 30 minutes.
3. Meanwhile, mix up your chocolate icing:
4. Combine all chocolate icing ingredients in small bowl.
5. Blend ingredients with a hand held mixer. (Add more milk if necessary to reach your desired consistency.)
6. Using a piping bag, decorate Milano cookies to look like tombstones
7. After pudding has set up, sprinkle with graham craker crumbs and add a tombstone cookie.
8. Optional, add mint sprig as garnish

Monster Mouths

Saturday, October 2, 2010

Easy to make and so delicious. If you have older children this is a great recipe to get them cooking in the kitchen with you. You can substitute slivered almonds, marshmallows, or pumpkin seeds for the candy corn. I have a presonal love affair with candy corn so of course I opt for the sweeter version; the pumpkin seeds make realistic looking vampire teeth that I was very impressed with, too. This treat gets the Van Seal of Approval; just look at his happy little face.

Serves: 4 (1/2 apple per serving)
Start-to-Finish: 15 minutes
Recipe By: Better Homes and Garden

Ingredients:

2 apples
2/3 cup peanut butter
1/2 cup candy corn

Directions:

1. Cut apples into quarters.
2. Cut out a wedge from each quarter (try not to let these mouth wedges go all the way through the apple or your peanut butter will be able to sneak out the back).
3. Fill mouth wedge with peanut butter (if you are having trouble making the peanut butter stick, dry the apple a little with a paper towel).
4. Arrange the candy corn on the peanut butter to look like teeth.

Here we Go Again! Halloween Snacks

Friday, October 1, 2010

This year I decided to focus my Halloween recipes on snacks. Logically, lunches should come next but snacks require less time to prep which is something I don't have a lot of right now with my little ones continually underfoot. Stay tuned because, for the next 13 days of Halloween, I will be featuring 13 healthy, kid-friendly snacks that will bring the bewitching fun of the holiday to your home. These Halloween-themed snacks are perfect for after naps, packed in lunch boxes, and when your kiddos get home from school. Each recipe will include step-by-step directions, pictures of the process and completed snack, tips and advice from having tried and tasted each recipe, and a few photos of my adorable little goblins trying out my creations. Enjoy!

Tortoise Cheesecake

Sunday, September 5, 2010

It's times like this I wish I was a food photographer so I would be able to take a picture that would really do this cheesecake justice. It is five layers of chocolaty heaven all packaged in a show-stopping presentation. I call this a tortoise cheesecake because, without caramel, it can't be called a turtle cheesecake. The chocolate chips and chopped pecans on top add a nice variation of texture to the creamy cheesecake.


Serves: 16
Start-to-Finish: 2 hours + refrigerating overnight
Recipe By: Audra Burtch (with adjustments to suite my personal tastes)

Ingredients

1 3/4 cups chocolate graham cracker crumbs
1/3 cup butter, melted
3 (8-oz) pkgs cream cheese, softened
1 (14-oz) can sweetened condensed milk
1/2 cup sugar
3 eggs, at room temperature
3 TBSP lime juice
1 TBSP vanilla extract
1 1/2 cups semi-sweet chocolate morsels
2 TBSP chocolate flavor syrup
2/3 cup coarsely chopped pecans
1/4 cup semi-sweet chocolate mini morsels

Directions

1. Preheat oven to 300°.
2. Grease 9-inch springform pan.
3. Combine graham cracker crumbs and butter in medium bowl.
4. Press mixture into bottom of springform pan and 1 inch up side of pan.
5. Beat cream cheese and sweetened condensed milk in large mixer bowl until smooth.
6. Add sugar, eggs, lime juice and vanilla extract; beat until combined.
7. Microwave chocolate morsels in medium bowl on HIGH (100%) power for 1 minute; stir. (Morsels may retain some of their shape. If necessary, microwave at additional 10- to 15-second intervals, stirring just until morsels are melted.)
8. Stir 2 cups of cheesecake batter into melted chocolate morsels; mix well.
9. Alternately spoon batters onto crust, beginning and ending with yellow batter.
10. Bake for 70 to 75 minutes or until edge is set and center moves slightly.
11. Cool in pan on wire rack for 10 minutes; run knife around edge of cheesecake.
12. Let cool completely.
13. Drizzle chocolate syrup over cheesecake and sprinkle with pecans and mini morsels.
14. Refrigerate for several hours or overnight.
15. Remove side of pan and serve.

Chocolate Cupcakes with Strawberries & Cream filling

Wednesday, August 11, 2010

This dessert is semi-homemade but no one will ever know with how delicious the cupcakes taste and fancy they look. The strawberries and cream filling is a melt-in-your-mouth suprise that adds freshness to the rich chocolate cake and sugary frosting. I like mine super-filled with strawberries and cream so the cupcakes almost burst at the seams, Yum! On a side note: I made a whole batch of fancy ones for pictures but my camera wasn't working and they all got eaten before I could get a good shot. These cupcakes go fast.

Serves: 18 cupcakes
Start-to-Finish: 1 hour
Recipe By: www.TidyMom.net

Ingredients:

Cupcakes
1 box chocolate cake mix
3 large eggs
1/2 cup melted butter (butter not margarine)
1 cup water

Filling
1 cup heavy whipping cream
1/3 cup sugar
1 tsp vanilla
6 strawberries

Frosting
½ cup butter, at room temperature
8 oz. cream cheese, at room temperature
1 tsp vanilla
½ cup unsweetened cocoa
4 cups powdered sugar
2 TBSP heavy whipping cream

Directions:

1. Preheat oven to 350.
2. Blend all cupcake batter ingredients together for 5 min.
3. Pour into paper lined cupcake pan.
4. Bake for 20 min.
5. Remove cupcakes from pan and cool on wire rack.
6. Meanwhile, make the strawberry cream filling.
7. Chop strawberries in blender until they are thick and liquidy.
8. Set stawberries aside.
9. Beat heavy whipping cream and vanilla until mixture starts to thicken.
10. Mix in sugar.
11. Fold in strawberries.
12. Once cupcakes have cooled completely, cut out a section from the center of each cupcake. (I used an apple corer, it worked perfectly.)
13. Fill the cupcake hole with the strawberry whipped cream. (Don't worry about covering the hole we are hiding it with frosting.)
14. Make the frosting by placing butter and cream cheese into a large mixing bowl and blend until combined.
15. Add cocoa powder and fully incorporate.
16. Add vanilla and powdered sugar and blend on low speed until combined.
17. Increase to medium speed and beat until mixture begins to get fluffy.
18. Slowly add the heavy cream, a little bit at a time until desired consistency is met
19. Beat until fluffy, about 1 minute.
20. Pipe frosting on to cupakes to cover the strawberry cream filling.
21. Ganish with a fresh strawberry slice and enjoy!