Artisan Bread

Wednesday, December 22, 2010


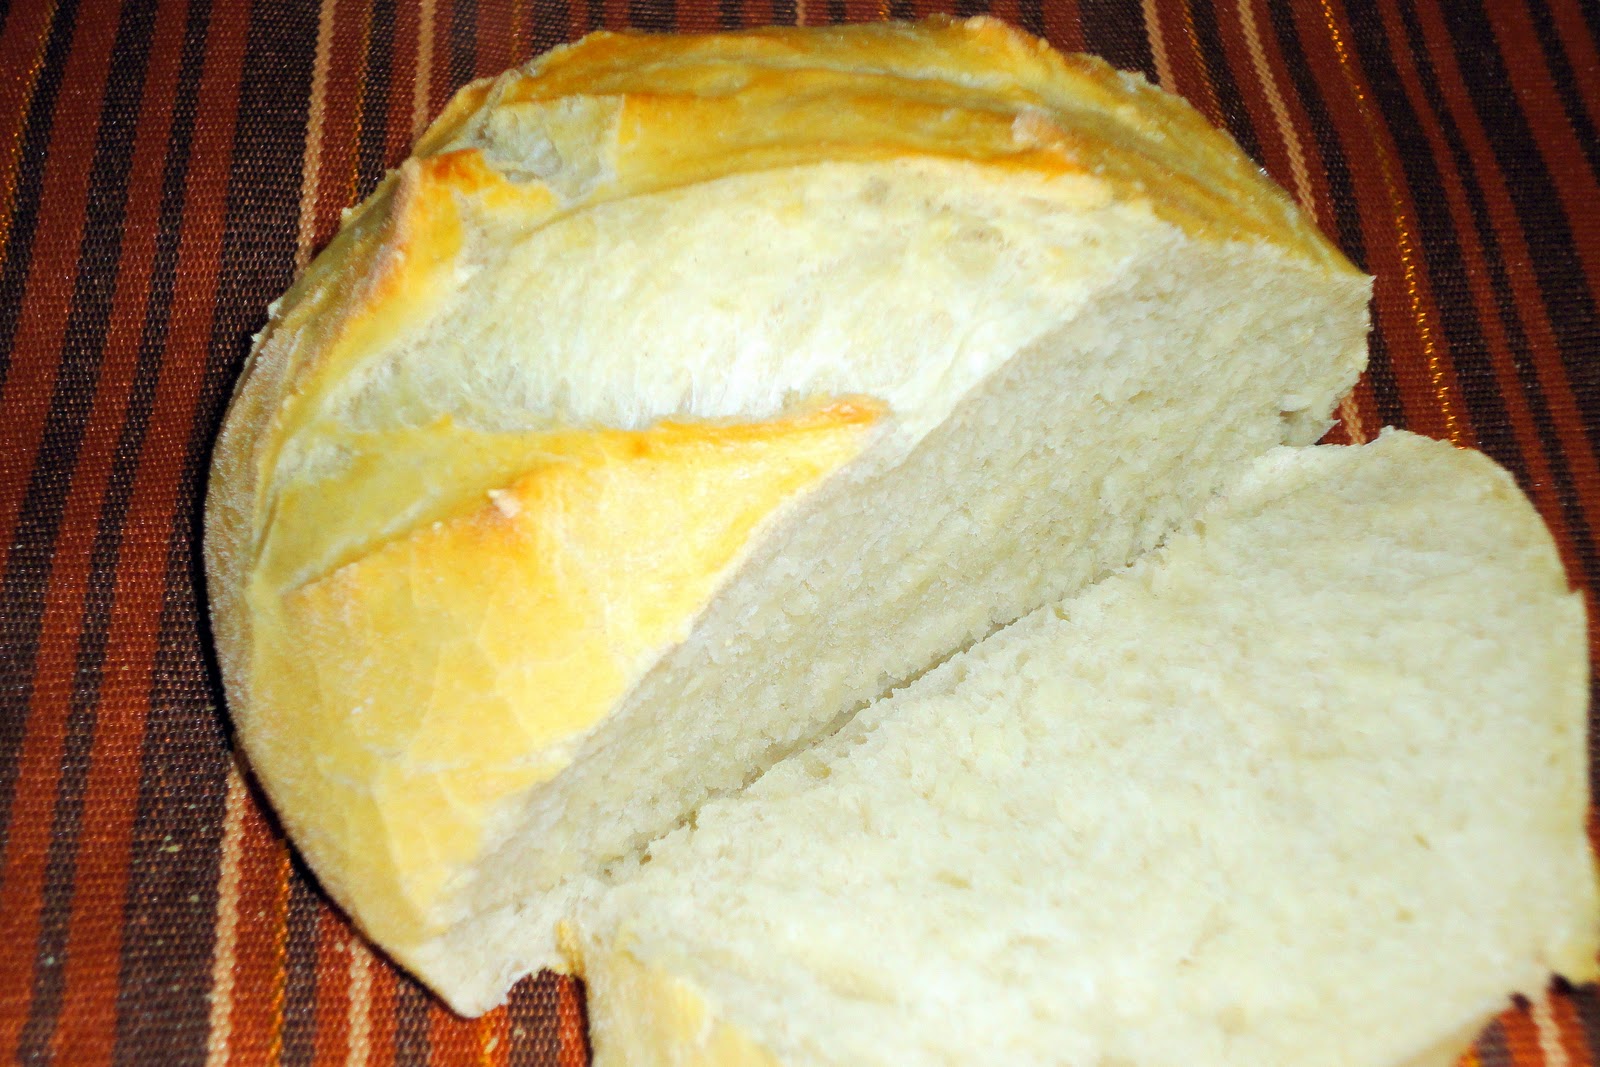
I got this fantastic bread recipe at a food storage cooking class about using your stored wheat.  The teacher ground whole wheat and used it in the bread.  It was so delicious I couldn't pass up the offer to take some dough home with me and try to make the bread myself.  Since then I have made these delicious little loaves several times and have even given them away to neighbors and friends.  The bread is very easy to make, it just takes some pre-thought and preparation throughout the day. It goes well with soups or chili or just to snack on throughout the day with a little bread and jam.


Makes: 4 small loaves
Start-to-Finish: 3.5 hours (most of this is letting the dough rise or cook, not active prep time)
Recipe By: Cathy Turner

Ingredients:

3 cups warm water
1 1/2 TBSP Kosher salt
1 1/2 TBSP yeast
6 1/2 cups flour (some white, some whole wheat)
... later you will need: additional flour for kneading and dusting, cornmeal, 2 cups boiling water

Directions:

1.  Mix all ingredients in Kitchen Aid mixer using your hook attachment.
2.  When combined place in a large bowl with a loose fitting lid or cover loosely with Saran wrap.
3.  Let sit on the counter for 2 hours (or, if you are not planning on making the bread today, put it in the fridge.)
4.  Cut out a grapefruit size piece of dough (1/4 of the dough) and place on a floured surface. (Use lots of flour, dough will be sticky.)
5. Knead a couple of times and let sit for 20 minutes in a warm place on a slide with cornmeal or 40 - 60 minutes if it has been in the fridge. (Mine took about double this time to rise because my house was cold.) (What is a slide? Anything you can slide the dough off from one surface to another without requiring you to pick it up and risk the rising dough to fall. The cornmeal will keep it the dough from sticking to the slide. Just give it some forward motion and watch it fly.)
6.  Heat oven to 400* with your bread stone already inside. (I don't have a bread stone so I used an upside down standard cookie sheet and it worked just fine for me.)
7.  Add 2 cups of boiling water to a pan on the lower shelf of the oven.
8.  Slide the dough onto the hot bread stone in the oven. (Here is where you use that forward motion.)
9.  Bake for 30 minutes.
10.  The dough will get a little more sour tasting each day you let it sit in the fridge. It is too sour by day ten.

Maple Pecan Cheesecake

Thursday, December 16, 2010

Combine a pumpkin pie, a pecan pie and a cheesecake. Three desserts in one bring a face lift to old classics.  This is one dessert with ALL the flavors of holidays in one delicious bite.

Serves: 20
Start-to-Finish: 6 hours 35 minutes ( 5 hours cool off and chill)
Recipe By: Anne Thornton

Ingredients:

Cheesecake:
1 1/3 cups graham cracker crumbs (approx 12 graham crackers)
1/4 cup sugar
1/4 cup butter, melted
3 (8-oz) pkgs cream cheese, softened
1 (14-oz) can sweetened condensed milk
1 (15-oz) can pumpkin
3 eggs, at room temperature for 30 minutes
1/4 cup pure grade B maple syrup (Grade B comes from the color and flavor, not the quality of the syrup.  It simply means it was harvested later in the year so it has a deeper brown color and more earthy flavor.)
1 1/2 tsp ground cinnamon
1 tsp ground nutmeg
1/2 tsp salt

Maple Pecan Glaze:
1 cup whipping cream
3/4 cup pure grade B maple syrup
3/4 cup chopped pecans

Directions:

1.  Preheat the oven to 325*.


For the cheesecake:
2.  Finely crush the graham crackers in a plastic bag with a rolling pin or use a food processor.
3.  In a bowl, combine the graham cracker crumbs, sugar, and melted butter.
4.  Firmly press graham cracker mixture into the bottom of 9-inch springform pan. (You don't need to come up the sides.)
5.  In a mixer, beat the cream cheese until fluffy.
5.  Gradually mix in the sweetened condensed milk until smooth.
6.  Add the pumpkin, eggs, maple syrup, cinnamon, nutmeg, and salt, mix well.
7.  Pour into the springform pan.
8.  Bake until the center appears nearly set, but jiggles a little when shaken, 1 hour and 15 minutes.
9.  Cool for 1 hour.
10. When cooled, cover and chill overnight, or for at least 4 hours.

For the glaze:
11. In a medium-sized saucepan, combine the whipping cream and pure maple syrup.
12. Boil until slightly thickened, 15 to 20 minutes, stirring occasionally.
13. Stir in the chopped pecans.
14. Cover and chill until time to serve.
15.  To serve, spoon the glaze over the cheesecake. (I had a LOT of trouble removing the cheesecake from the spring-form pan. My crust was stuck fast to the side of the pan, so really make sure you run your plastic knife along the edges until the sides can break away cleanly or else it will tear the cheesecake.  Mine tore in half; I pushed it back together and covered the tear with the glaze and no one knew :)

Herb-Garlic Beef Roast

Tuesday, December 14, 2010

When I first saw this recipe I thought the picture made the dish look mouthwatering but the refrigerated, cooked beef scared me. So I tucked the recipe away in my files and subsequently forgot about it.  Then the holiday season snuck up on me and suddenly I had more things to do than was physically possible in a 24-hour day so I pulled out my recipe files and only looked for the meals that could be made in less than 30 minutes with lots of shortcuts and cheats. This recipe popped back up and I was much more willing to give it a chance. I am really glad I did because it was delicious and I learned some things about  pre-cooked, refrigerated meats. First off, the brand you buy strongly dictates whether the meat will be appetizing or not. Secondly, you get what you pay for as far as cuts and quality of meat.  And lastly, if you have done your homework right, you can buy some very clean and delicious pre-cooked and packaged meat right from your grocery store which are perfect for cutting time off your dinner preparation.


Serves: 4
Start-to-Finish: 30 minutes
Recipe By: Better Homes and Gardens Magazine

Ingredients:

1 (17-oz) pkg refrigerated cooked beef roast au jus (I bought HEB brand and was happy with the clean cut and freshness of the meat)
2 medium red potatoes
2 medium carrots
1 medium sweet potatoes (add more veggies if you want to stretch this meal)
1 TBSP cooking oil
Freshly ground black pepper
3 TBSP chopped fresh Italian parsley (flat-leaf not curly leaf)
4 cloves garlic, minced
1 TBSP finely shredded lemon peel

Directions:

1. In large skillet cook beef roast, covered, over medium heat for 10 minutes.
2.  Uncover and simmer for 5 minutes more, until juices are slightly reduced.
3.  Meanwhile, peel and cut your vegetables into 3/4 inch pieces. (The more uniform the size of the pieces the more uniform the cooking).
4.  Place vegetables in microwave-safe dish.
5.  Drizzle with cooking oil and sprinkle with pepper; toss to coat.
6.  Tightly cover with lid or plastic wrap. Microwave on high for 10 minutes or until tender. (I have also made this dish where I roasted the vegetables on a foil-lined cookie sheet in the oven for 20 minutes at 400; but it adds 10 minutes to the total time of the recipe so it depends on your time constraints.)
7.  For herb-garlic mixture, in a small bowl combine parsley, garlic, and lemon peel.
8.  To serve, stir vegetables into skillet with beef and juices and sprinkle with herb-garlic mixture.

Triple Mango Chicken

Friday, December 3, 2010

The flavors from the mango add a delicious tropical sweetness that is tempured by the eathy flavors from the zucchini. It is wonderful and savory but best of all it really only takes 20 minutes start to finish to get this meal on the table.  I was so happy and impressed with the results we licked the pan clean the first time I made it and put it for the menu for the following week to serve double. At only 274 calories per serving this is a delicious dinner option you can feel good about, the only problem is ... it's hard to stop at just one serving.

Serves: 4 servings
Start-to-Finish: 20 minutes
Recipe By: Better Homes and Gardens Magazine

Ingredients:

1 TBSP olive oil
4 skinless, boneless chicken breast halves
1 mango, seeded, peeled and cubed
1/2 cup mango-blend fruit drink or mango nectar
1/4 cup mango chutney
2 medium zucchini, thinly sliced lengthwise

Directions:

1.  In a large skillet heat oil over medium-high heat.
2.  Add chicken to the pan and cook 6 minutes until one side gets golden edges; turn.
3.  Add mango cubes, mango drink, and mango chutney.
4.  Cook 6 minutes or until chicken is no longer pink, stirring occasionally.
5.  Meanwhile, slice zucchini and place in microwave-safe bowl with 1/4 cup of water.
6.  Cover with vented plastic wrap.
7.  Microwave on 100 percent power (high) for 3 minutes, stirring once; drain.
8.  To serve, place chicken on top zucchini. Season with salt and crushed red pepper.